 Zulip
Zulip
Zulip is a powerful open-source team chat platform that combines real-time messaging with email-style threading. Designed for both live and asynchronous conversations, Zulip helps teams stay organized and productive. Easily deploy your own Zulip server on Linux to maintain full control over your data and customize the platform to fit your organization’s needs.
Core Features
- Topic-based threading: Organize conversations within streams using topics, making it easy to follow and manage discussions.
- Cross-platform clients: Access Zulip via web, desktop (Windows, macOS, Linux), mobile (iOS, Android), or terminal applications.
- Self-hosting capabilities: Deploy Zulip on your own servers to ensure data privacy and compliance with organizational policies.
- Extensive integrations: Connect with tools like GitHub, Jira, and more to streamline your workflow.
- Advanced search and filters: Quickly find messages and topics with powerful search capabilities.
- Customizable notifications: Tailor notification settings to stay informed without distractions.
- Open-source and transparent: Benefit from a transparent development process and community-driven improvements.
Deployment Features
| Time | OS | RAM | Disk |
|---|---|---|---|
| 20–30 min | 2Gb | 20Gb |
- Installed software:
ZulipPostgreSQLRabbitMQRedismemcachedNginx(Used as a reverse proxy for handling HTTPS traffic.)Certbot(Used to automatically obtain and renew TLS certificates from Let's Encrypt.)
- Open ports:
80,443– Web access (HTTP/HTTPS)
- Files path:
/home/zulip
By default, we install the latest stable version of the software from the developer's website or official repositories.
Getting Started After Zulip Deployment
After completing your payment, you will receive an email at the address provided during registration notifying you that your server is ready. This email will include the IP address of your VPS and login credentials to access the Zulip web interface:
- Link: https://example.com
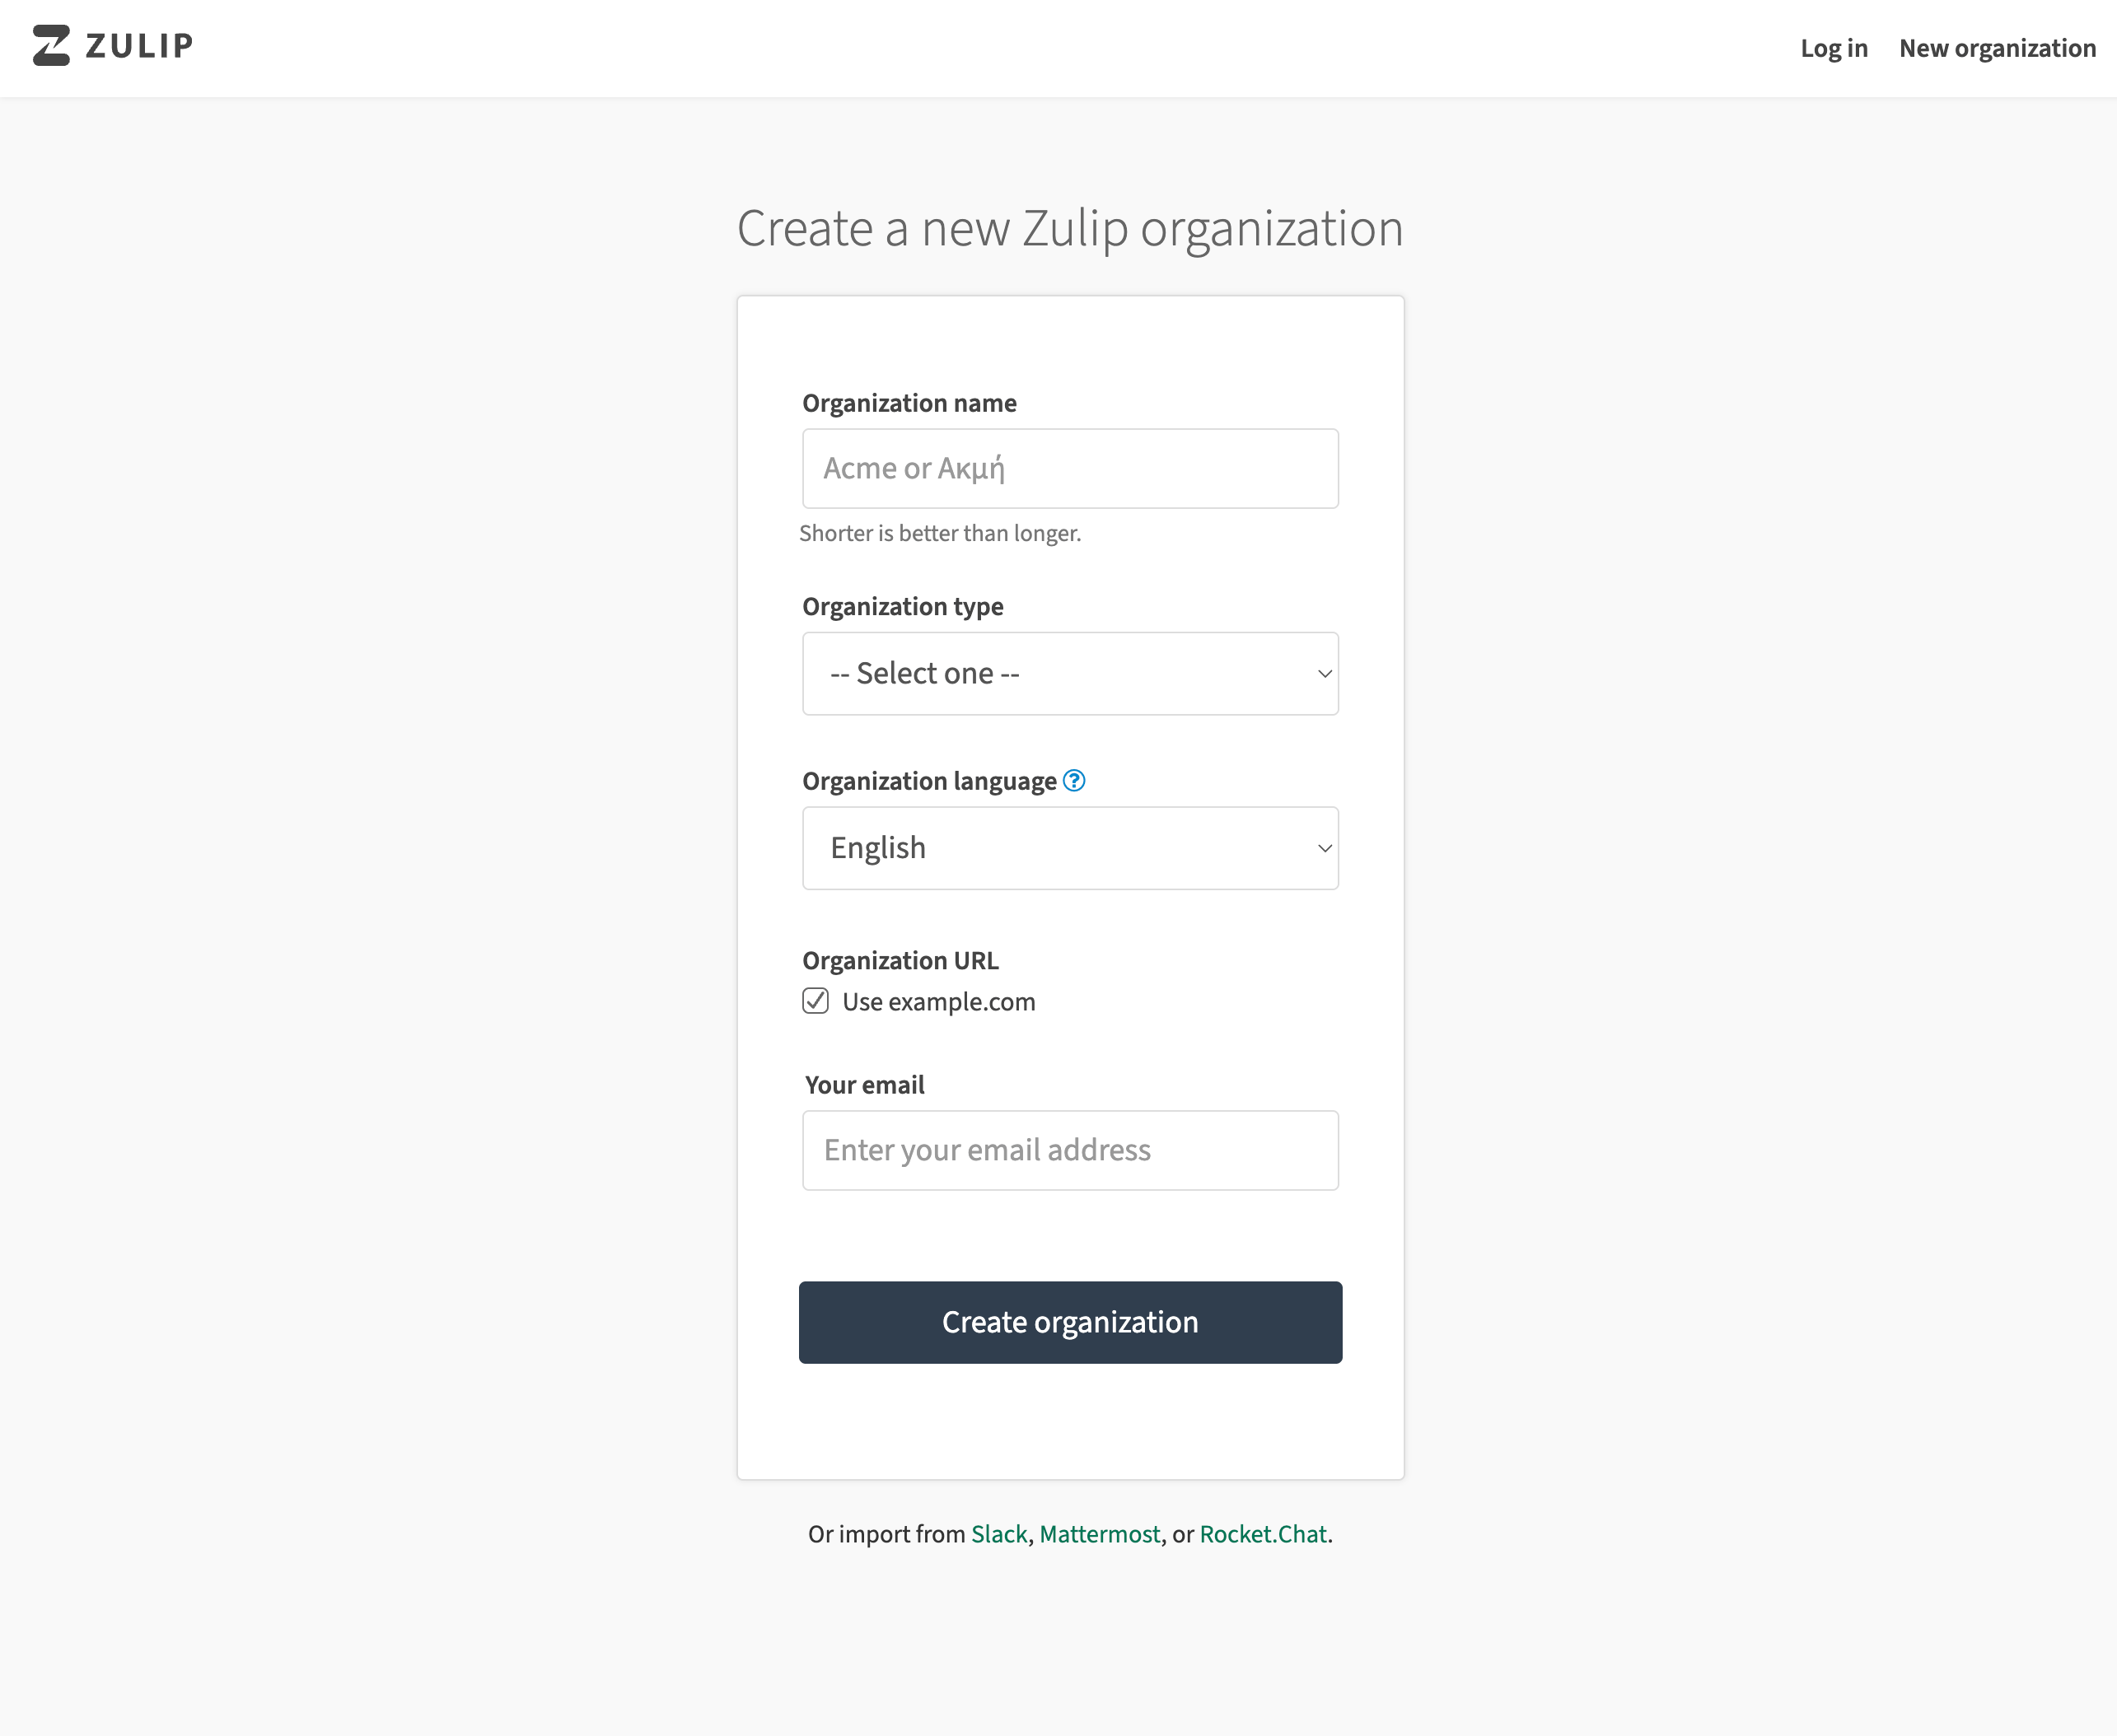
When you first log in to Zulip, you will be greeted by a simple setup wizard. On this screen, you’ll need to create your organization by entering its name, selecting the type and language, and providing your email. Once the organization is created, you can invite your team and start collaborating right away.
The access credentials for your VPS are listed in the "Virtual Servers" section — select your server and click "Instructions." This information is also provided in the email you receive after installation.
Initial Setup
After registering, Zulip creates a workspace for your organization. You immediately get access to chats, streams, private messages, and onboarding tips for quick and efficient collaboration.
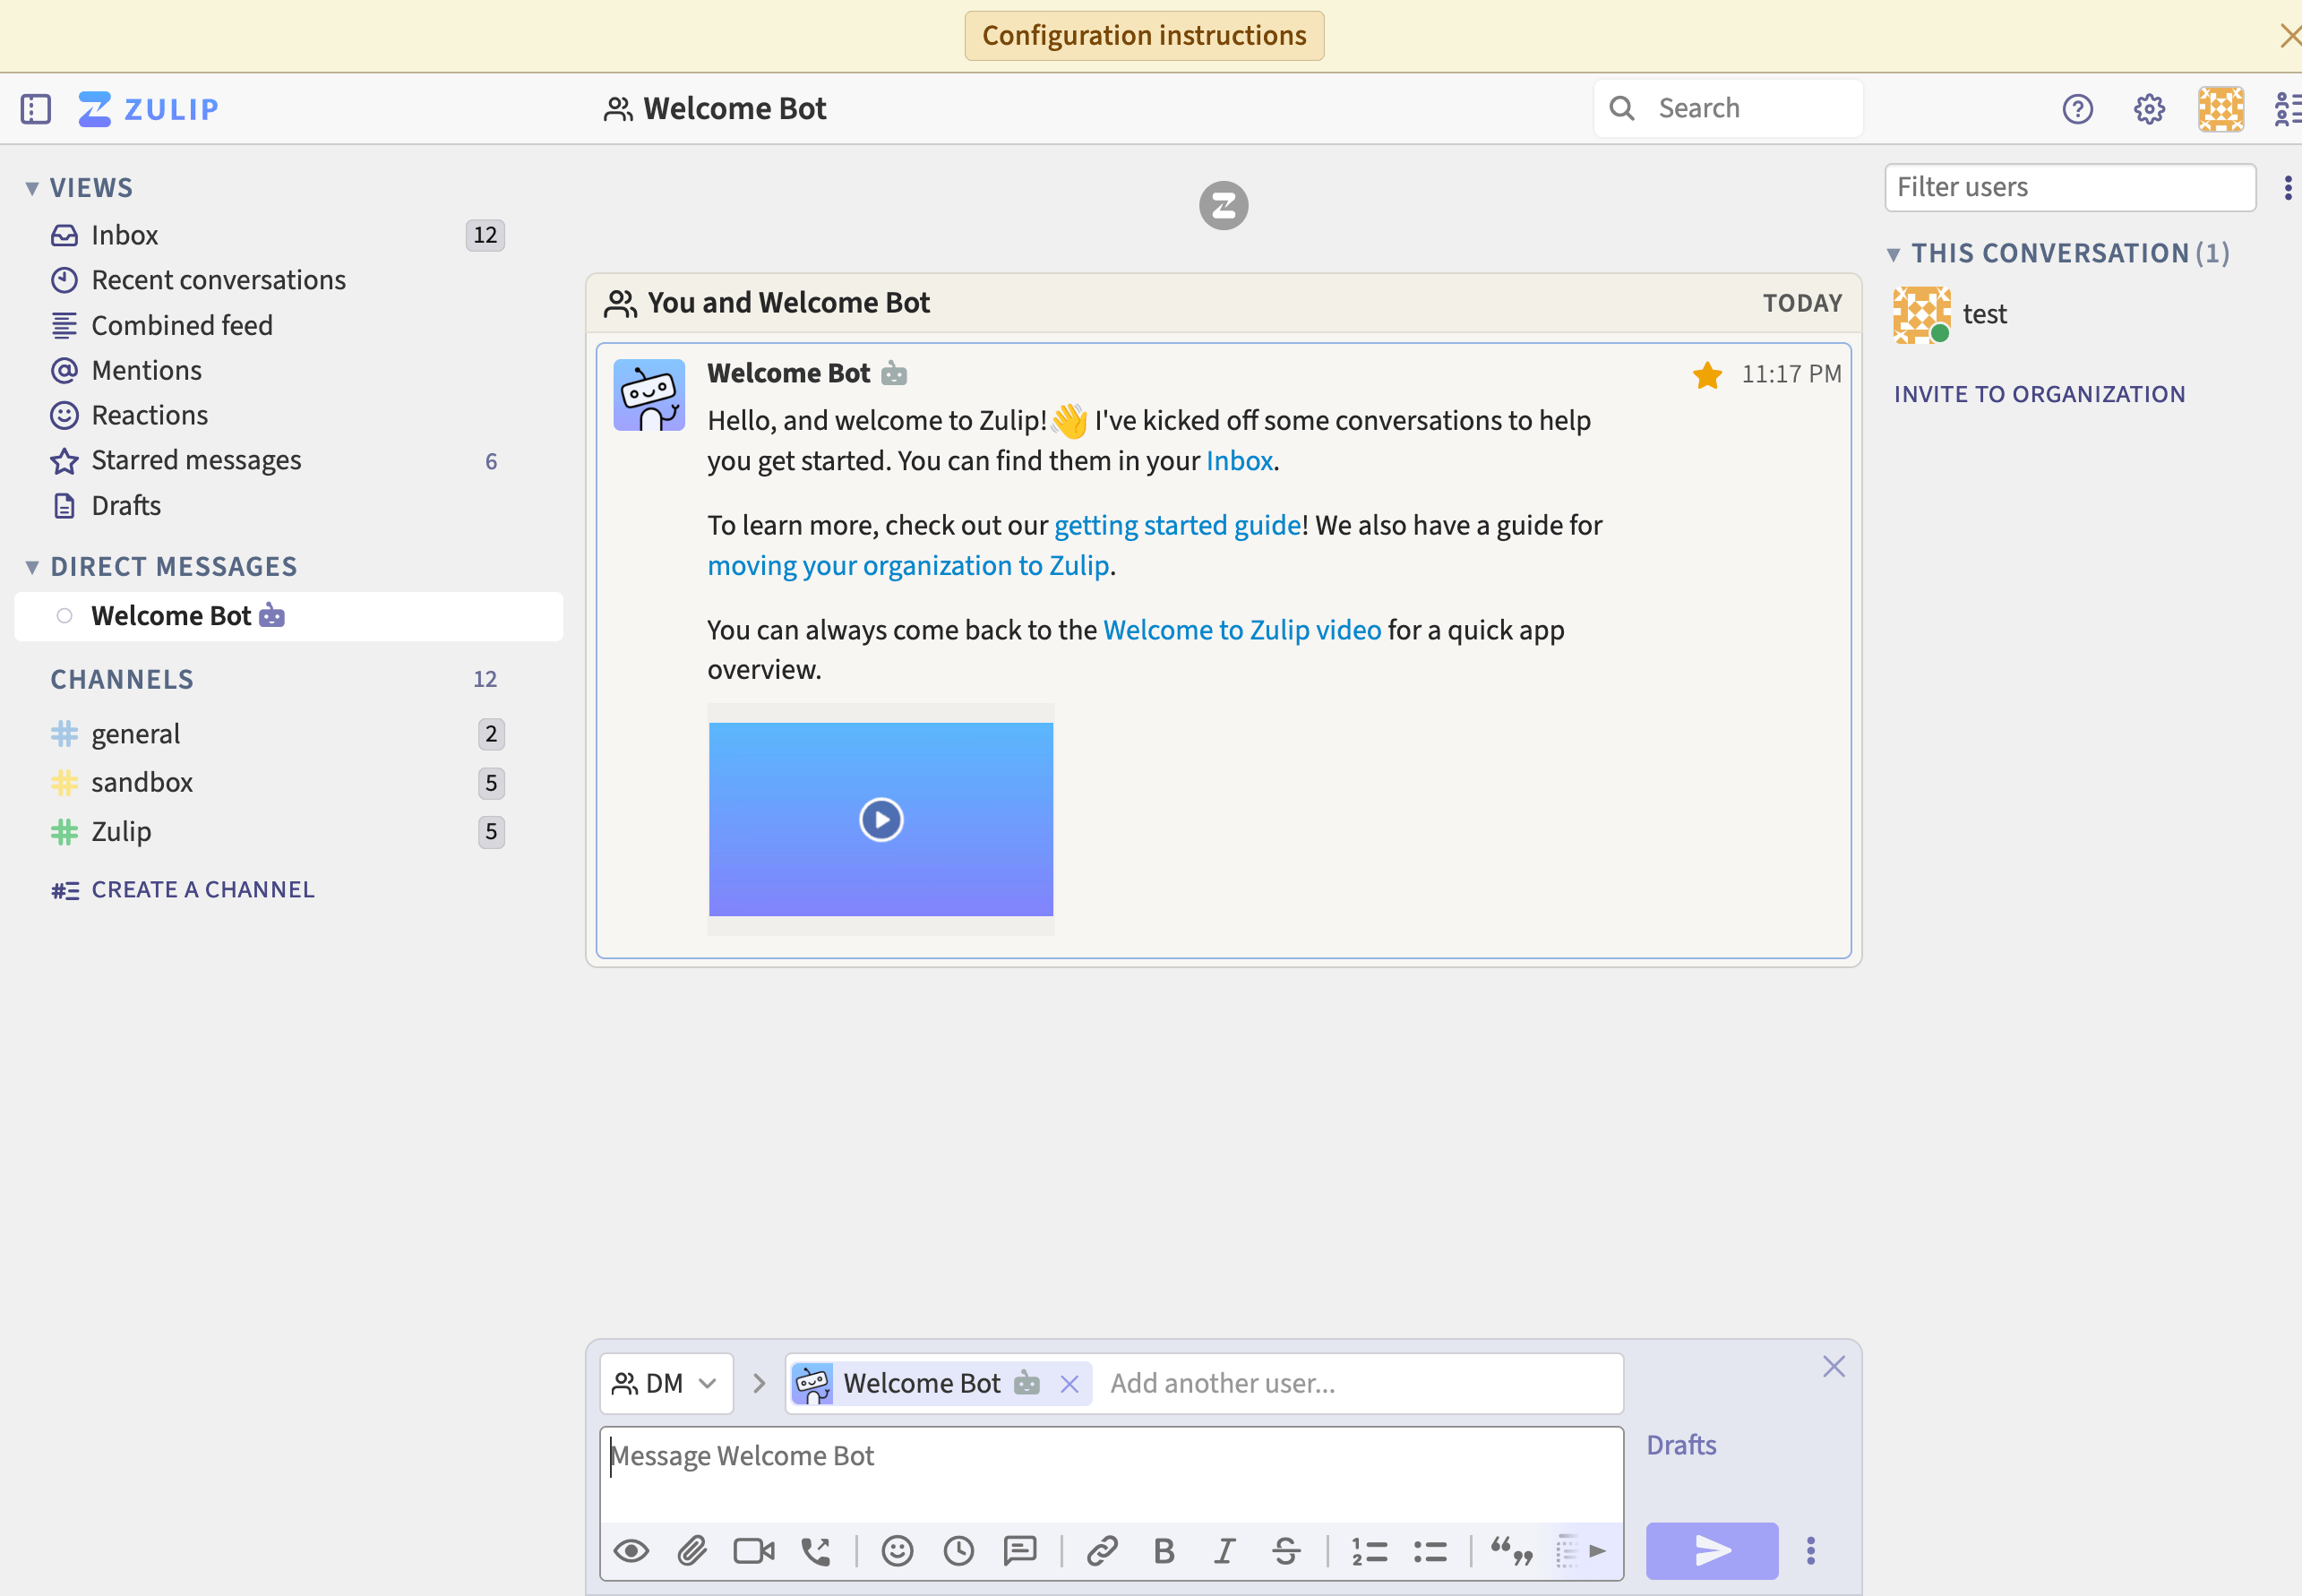

- Views and navigation: On the left panel, you see your inbox, recent conversations, mentions, reactions, starred messages, and drafts for easy navigation.
- Direct messages and streams: Below, you find direct messages with users and a list of channels ("streams") grouped by topics.
- Workspace header: The top panel displays configuration instructions, search bar, and workspace management tools.
- Main chat area: In the center, you see the current conversation or selected topic with the full message history and useful onboarding information.
- Message composer: At the bottom, the message composer allows you to send text, format messages, add attachments, emojis, and start threads.
- User and organization management: Invite users to your organization directly from the sidebar and manage team collaboration easily.
Detailed information on the main Zulip settings can be found in the developer documentation.
Updating Zulip
When a new version of Zulip is released, you can safely upgrade it. Read the upgrade notes for all releases between your current version and the version you are upgrading to.
curl -fLO https://download.zulip.com/server/zulip-server-latest.tar.gz
/home/zulip/deployments/current/scripts/upgrade-zulip zulip-server-latest.tar.gz
Upgrading will result in brief downtime for the service, which should be under 30 seconds.
PostgreSQL upgrade steps for the Zulip server:
- Stop the server:
su - zulip -c '/home/zulip/deployments/current/scripts/stop-server' - Take a backup, in case of any problems:
su zulip -c '/home/zulip/deployments/current/manage.py backup --output=/home/zulip/postgresql-upgrade.backup.tar.gz' - Run the database upgrade tool:
/home/zulip/deployments/current/scripts/setup/upgrade-postgresql - Start the server again:
su - zulip -c '/home/zulip/deployments/current/scripts/start-server'
Now you should be able to access the Zulip server by entering its URL in your web browser. Log in to your account and verify that all main features, messages, and integrations are working as expected.
Zulip Mobile and Desktop Apps
If you already have access to a Zulip server, you can connect directly using the server address or invitation link. Simply enter the provided URL in the Zulip desktop or mobile app, or open it in your web browser to log in with your credentials and start collaborating.

iOS
iOS 14.0+

Android
Android 7.0+

Windows
10+

macOS
12+

Linux
***
Opening SMTP Ports
For security reasons, outgoing TCP ports (25, 465, and 587) are blocked by default on all VPS servers. This measure aims to prevent spam distribution. To lift the block, follow these steps:
- Register your domain zone. The A-record for your domain must point to your server’s IP address.
- Submit a request to technical support specifying that you need to open outgoing SMTP ports for sending email and the domain (or subdomain) from which it will be sent.
- After analyzing your domain name, we will make a decision on opening the SMTP ports and notify you.
Opening SMTP ports may require additional details about your domain name and its intended use.